
As a proof of concept it’s reasonably successful. From five feet away it looks convincing enough to pass for a real mummified specimen, but that’s an admittedly low hurdle to jump. In terms of the sculpting it’s definitely not up to modern standards. That’s a failure of effort, not of the materials. The fine paste I used for the inner mouth is capable of holding the same amount of detail as clay. I simply didn’t take advantage of it.
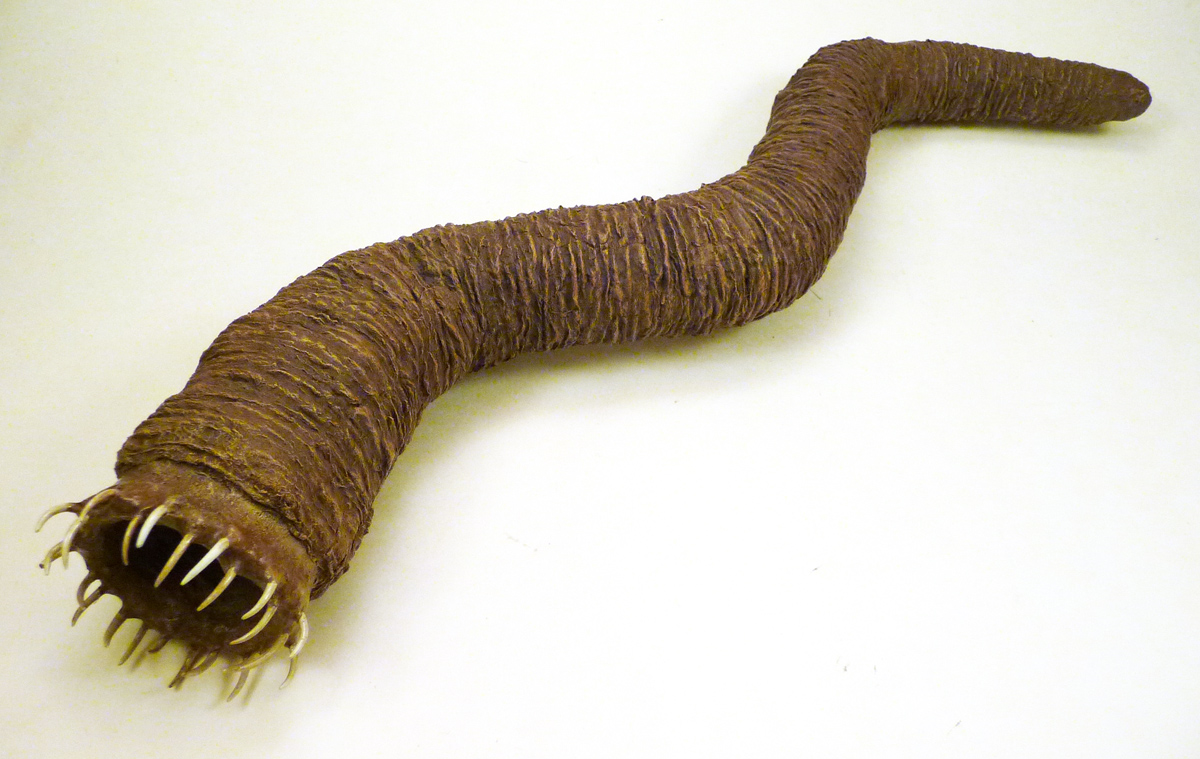
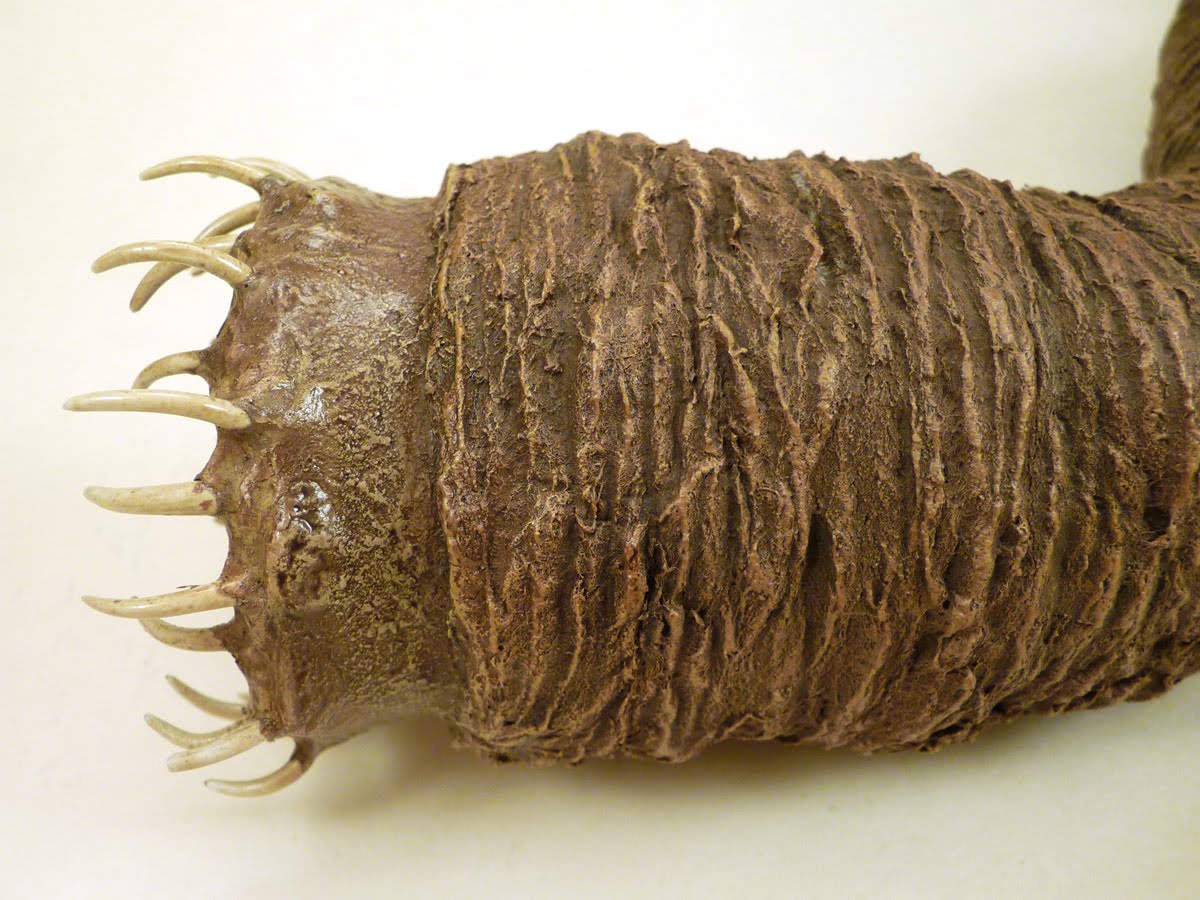
This shot from about two feet away gives a good feel for what worked and what didn’t. At this distance the wrinkled texture on the body holds up really well. It was formed using a thick layer of cotton fiber saturated with a mixture of white glue, flour, and water. It would be even more convincing if I had used a thicker layer of fiber to create deeper indentations and sharper ridges.

The mouthparts are where there’s the most room for improvement. I wanted a smooth texture for the “gums”, and in that respect applying a layer of paste over the paper ring holding the teeth was a success. What’s missing is a greater textural contrast between the body and the mouthparts.
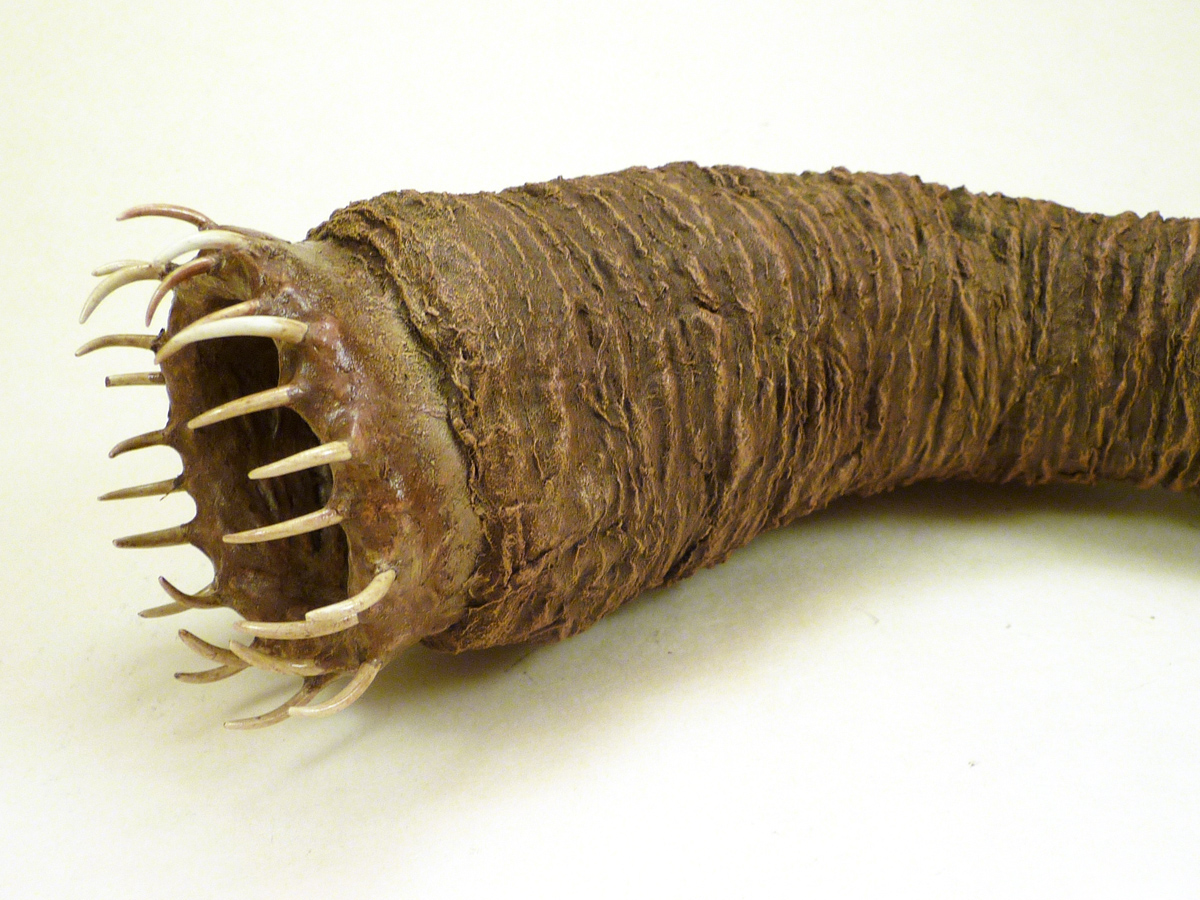
This view is a good demonstration of how the specimen could be improved. Building up the demarcation between the wrinkled skin and the gums would give a more convincing impression of the mouth extruding from inside the body cavity. A lot of that relatively smooth finish should be replaced with some fleshy ridges supporting the teeth and running perpendicular to the body rings. It’s more anatomically correct and would provide a better visual contrast.
From here you can see that the teeth are kind of bland. The points need to be sharper and their density needs to be increased. There are also some major problems with gluing them to the underlying support ring and then applying the paste for the gums. That approach produces a sloppy finish that splashes on to the teeth and is devilishly hard to clean up. The socket structure for each tooth needs to be applied individually and then glued to the foundation ring. That would solve the splash problem and look more believable, as well as producing some of the much needed texture I mentioned earlier.
Despite validating some of the techniques I wanted to try there’s a lot wrong with this specimen. And that’s a good thing. Not to get all meta, but one of the most valuable lessons in art, not to mention life, is to embrace the suck. Failure is your friend. A willingness to recognize it is the only way to improve yourself and your craft.
This article originally appeared at Propnomicon.

This work is licensed under a Creative Commons Attribution-Noncommercial-Share Alike 3.0 Unported License.
Gravedigger’s Local 16 is not to be held responsible for the content on or anything that may occur (be it good or bad) as a result of visiting any links (or constructing a project that’s detailed on them). Attempt at your own discretion.