
The whole idea behind these gaffs is to create something that meets modern standards using vintage techniques. In that sense they’re experiments in both materials and my own sculpting ability. The original Death Worm gaff was pretty mediocre, but that was to be expected. I don’t have any real artistic ability and it was my first attempt at doing detailed work in paper mache. What I do have is a willingness to learn from my mistakes and be happy with getting just a little bit better every time I try something. From that standpoint I think this specimen shows some real growth. It’s not great, but it’s a huge improvement over the first attempt.
Just click on the pictures to view the high resolution versions. If you’re using Firefox you can right click and then “Open Link in New Tab” to get the raw images.
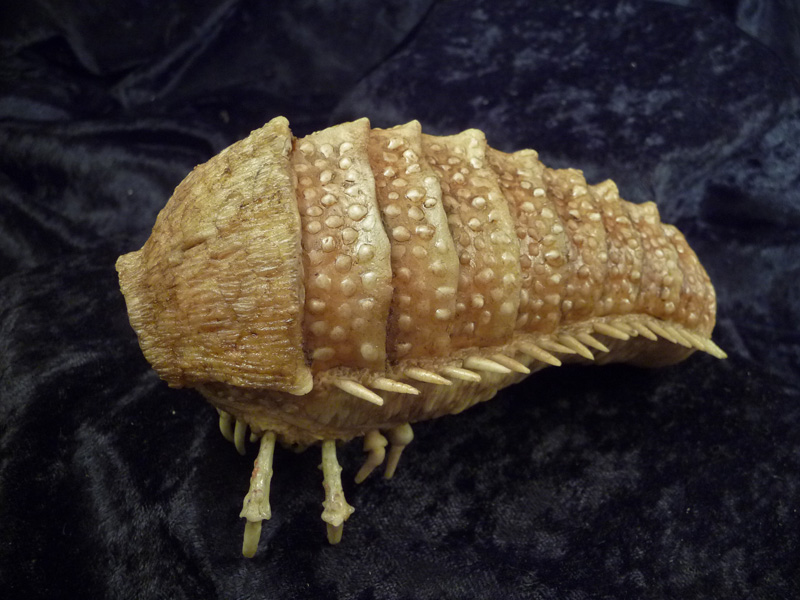
Here’s an overall view of the specimen. It’s roughly six inches long and finished with a single detail wash of burnt umber and a coat of golden oak wood stain. I didn’t use any colorants in the initial mache mixture, so before finishing the entire piece was slightly off white. That turned out to be a mistake. It made it very difficult to see details as I was working on them. Next time around I’ll add at least a touch of color to the mix beforehand.
One of the biggest lessons from the first gaff was the importance of texture, so I tried to make sure this piece was absolutely covered with a variety of surface finishes. That approach worked in general, but I’m not really happy with the pebbled effect on sections of the upper carapace and forward body. Instead of that smooth look I wanted a spikier appearance with a visible point. I tried creating it by applying a dot of thick flour and glue paste and stretching it to a point as I drew the brush away, but there wasn’t enough surface tension to support it.
One the other hand, the shell-like texture on the upper head came out great. I should have used that finish on the entire carapace.
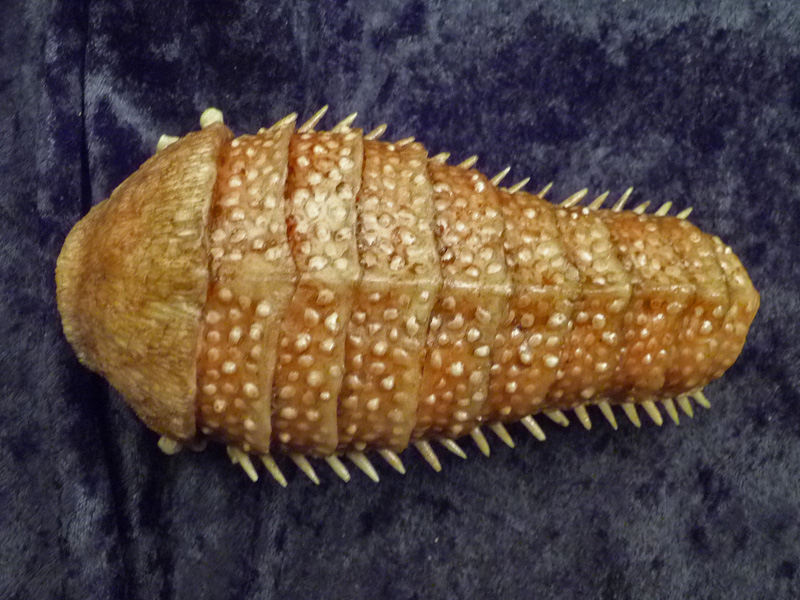
This shot gives you a better feel for the effectiveness of the different finishes on the carapace. The pebbled texure is…meh. The lateral lines of spikes came out surprisingly well. Each of them is about a quarter of an inch long. I had some major concerns about them breaking during handling, but the fiber-reinforced mache paste is incredibly strong. I credit that to the boiled linseed oil. I added that after doing some research into the paper mache goods made during the Victorian era. It not only makes the mache mixture handle just like clay, but it polymerizes as the piece dries and creates a resiliant composite material.
The view from the rear. The basic structure of the carapace is good, but it would be more visually interesting if the sections flared out a bit more.
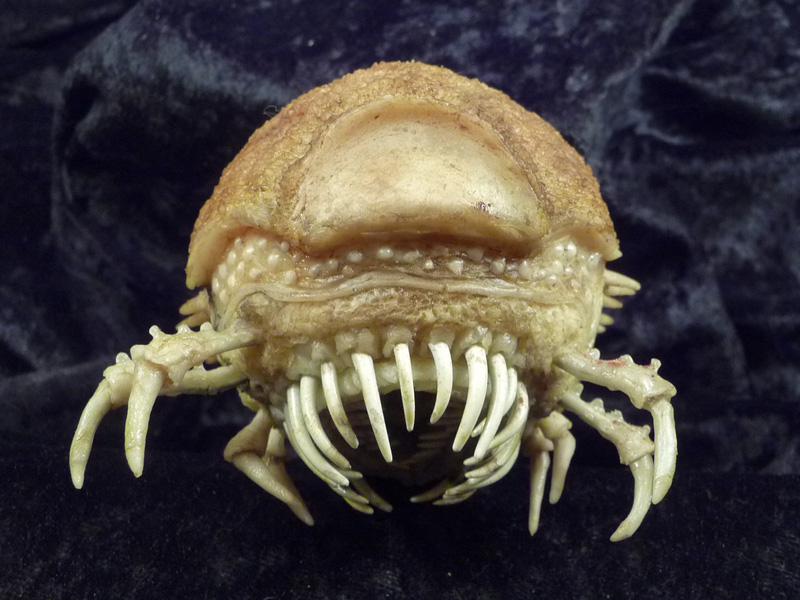
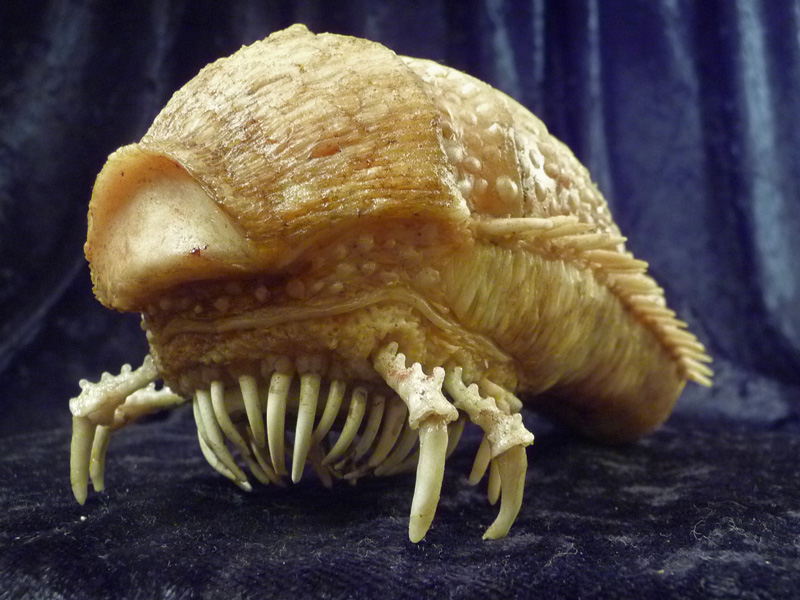
A view of the head. First, the bad. The teeth. For some reason the epoxy putty will come to a fine point when it’s being worked, but during the setting up process that sharp end smooths off. If I’m going to feature them so prominently I have to find way to stop that.
On the good side there’s a lot of interesting texture here. Unfortunately it’s not as visible as it should be because I didn’t go back and do a second detail wash to bring it out.
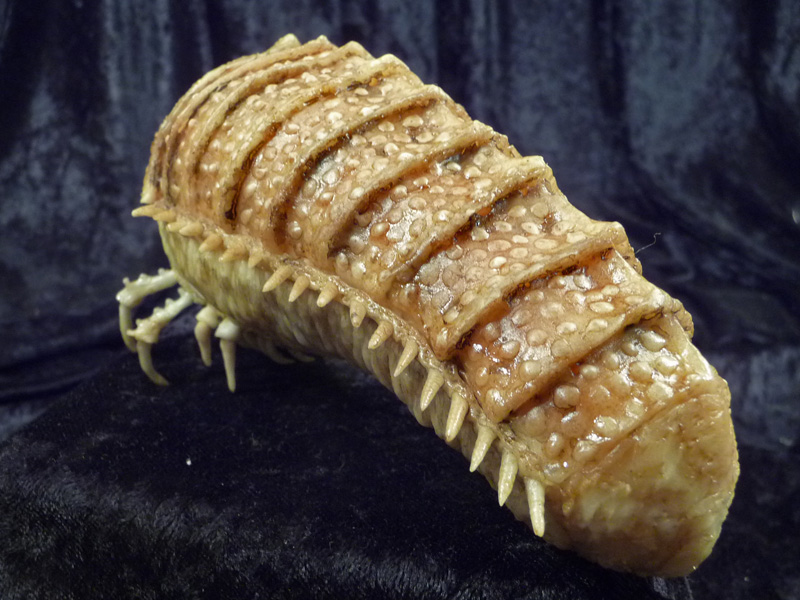
I’m pretty happy with how the legs came out, but there’s definitely room for improvement there. My primary concern was making sure they were strong enough not to snap during handling. The answer that problem was found in Japan, of all places. Craftsman there have been producing beautiful works with paper mache for centuries. One of the techniques they used for making finely detailed hands for puppets and human figures was an armature of steam-formed bamboo. Moistened slivers of the material were bent to shape and then set using heat, after which the details of the figure were sculpted using a fine rice flour paste. It was the perfect solution, both from a practical and historical perspective. The same technique was probably used to create gaffs in ancient Japan.

And finally, the underbelly. Once again there’s a lot of varying textures that would be clearer if I’d gone back and done a second detail wash. That’s a real problem for the mouth structure, where the secondary jaws and inner palps get kind of lost in this picture. In person it has multiple levels of detail reaching into the body of the beast and gives an impression of real anatomy, although I might have gone a bit overboard with the vagina dentata theme. The striations on the belly and tail came out extraordinarily well, reproducing the look of a swollen, engorged grub.
This shot also exposes another problem with the epoxy teeth- they’re a lot more fragile than I thought. I dropped the specimen once, and you can see that a tooth from both the outer and inner jaws snapped as a result. That’s really surprising considering they weren’t directly impacted during the fall. Even more interesting is that the lateral spikes came through the fall without any damage. They’re a lot tougher than they look. I credit that to the flexibility produced by adding boiled linseed oil to the mache mixture.
On a scale of 1 to 10 I’d give this attempt about a 5. There’s still a long way to go, but it’s a big improvement over my first try. That would have rated a 3, at best. For the next iteration I plan on increasing the level of detail so that there are multiple levels of texture layered over each other. What it needs is more spiky bits.
This article originally appeared at Propnomicon.

This work is licensed under a Creative Commons Attribution-Noncommercial-Share Alike 3.0 Unported License.
Gravedigger’s Local 16 is not to be held responsible for the content on or anything that may occur (be it good or bad) as a result of visiting any links (or constructing a project that’s detailed on them). Attempt at your own discretion.