
Those who know me in real life are often surprised at just how little I decorate for Halloween. That’s mainly because I live in an apartment complex and we don’t get any trick-or-treaters. I put up a decoration or two so I can keep my tradition of decorating each year but that’s about it. I used to go all out back when I lived in an actual house, which is why my parents eventually recruited me to come to their house to decorate their house each year. It all started when they had lost their one Halloween decoration while reorganizing the house. Then something came up and my stepfather wasn’t able to help hand out candy to all their visitors. So my mother asked if I could swing by to help out and what started as a one-off assist became a yearly tradition. It’s a lot of fun and I enjoy the opportunity to dig into my old props again. The only problem is just how dark it gets. In many cases you can barely see the props I put out. Here’s an example:

You can tell from the outline that it’s a scarecrow and sadly that’s all you can tell. It’s a modified version one of those cute scarecrows one often sees around this time of year. My parents’ neighborhood is practically infested with them this year. I had such grand plans when I got it from a former neighbor of mine who didn’t want it any more. I was going sculpt a scary new burlap face for it and was considering giving it a bloody prop sickle. But my schedule changed when I moved and didn’t have the time. Making a simpler and less detailed burlap mask was also considered but that also fell through and I opted to just put a scarecrow mask I had bought at a clearance sale on it. I was able to stuff a red glow stick in there the year I debuted the prop and although it gave the mouth and eyes a nice little glow, it wasn’t enough to get a good look at the scarecrow’s face. Repositioning the prop each year never resulted in any success. This is where Solvao came in.
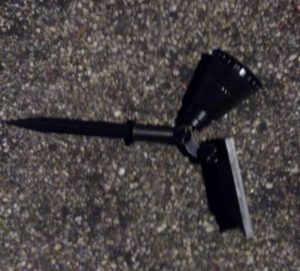
Solvao was kind enough to provide a pair of their spotlights, as one has to purchase each spotlight individually. In retrospect, I shouldn’t have left the other spotlight on scarecrow duty when I took this. Oh well. These spotlights use LEDs to provide lots of lighting power (200 total lumens from 4 individual 50 lumen LEDs) with little heat and much less electrical requirements than traditional lights. You can adjust both the angle of the light and angle of the solar panel using knobs, which both makes it easy to place them where they’ll get the most sunlight and project their own light where you want it. The panel can be adjusted 180 degrees up or down and the spotlight itself and be adjusted 90 degrees up or down. Such a degree of control is a must of haunt lighting given how light from low angles often makes things look spookier. They also provide attachable stakes for ground placement and you also have the option of mounting them on a wall (a trio of screws are provided, in addition to the light, stake and instructions). Speaking of which, the instructions state you should charge the lights in direct sunlight for 6-8 hours prior to using them. The “low brightness” setting will last for 6-9 hours while the “high brightness” setting lasts 3-5 hours.
I’ve noticed how some people out there seem to think solar powered items only work when the sun is out. Perhaps they’re thinking back to the cheap solar powered calculators they used back in school. As you can imagine, a solar spotlight doesn’t work that way. The power is stored in a rechargeable lithium battery for use at night. A Solvao solar spotlight uses an automatic light sensor which turns on the spotlight when the sensor no longer detects any sunlight. The presence of other lights can also effect the sensor, so make sure to place your spotlight(s) with that in mind. Assembling and setting up the lights on stakes was easy and required no special skills. I wish I had gotten these sooner, as a crowbar had to be used to dig into the cold, hard October soil. I could have easily pushed these into the ground in the spring and the waterproof (and weather-resistant, including summer heat) casing would have let me leave them out all year. As for the light produced by the spotlights, it’s a white light without the blue or yellow tinting which are often associated with LED lights. Although something about my camera often made it look blue when I took pictures. You can even notice a bluish tint to the picture of my scarecrow that was taken without the spotlight. The button to turn the light on or off, activate “high brightness” and activate “low brightness” is located on the underside of the solar panel. Just press it once to turn it on and then press it again until you reach the desired light mode. But there’s no need to turn it off if you’ll be leaving these out all year.
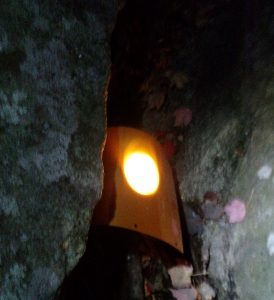
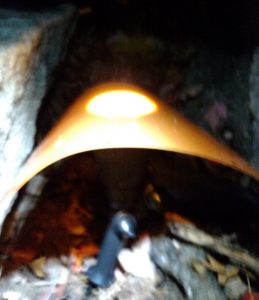
I tried illuminating the scarecrow on both the low and high settings. Here are the results:
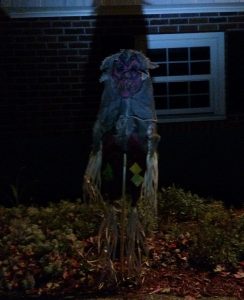
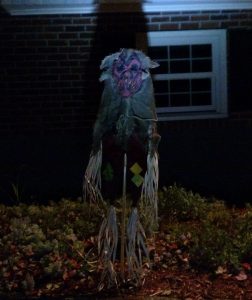
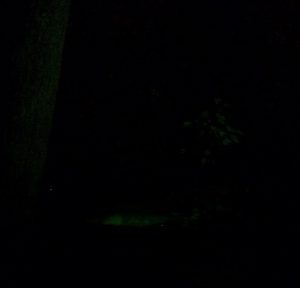
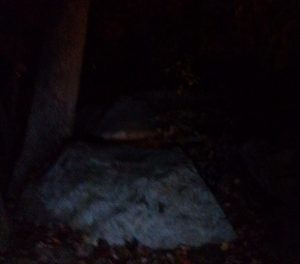
The low setting clearly wins out here. There’s enough light so you can see the scary mask while keeping it dark enough to keep things creepy. The extended life of the light on this setting is a great bonus. The only way it could possibly be any better is if Solvao sold some sort of plastic cap you could slide over the front to change the color of the light. This actually ties into my next lighting experiment. Originally I was going to set up the other spotlight in the front yard to illuminate another prop I had been planning to put together, but then inspiration struck as I remembered something interesting about the driveway. There’s a large rocky area near some trees and two of those rocks form an interesting hole of sorts:
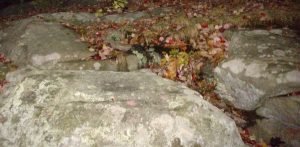
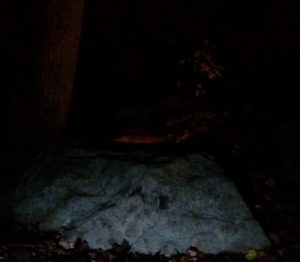
You’d think I’d have hands or a dummy positioned to look like something is crawling out of it, but it’s just too dark over there. Don’t let my use of a flash fool you. I had previously made glowing eye props using glow sticks and cardboard tubes to place around the area and the effect did look nice. The problem was how most trick-or-treaters made a beeline to the front door and don’t bother looking around to notice them! But then I got the idea to position a Solvao spotlight in there:
The adjustability of the spotlight is what made the effect possible. Thanks to the LED bulbs, the light was cool enough to layer a few spare plastic divider pages over it without the risk of heat melting them. That’s something you can’t do with incandescent or halogen spotlights! I’ll either set up a frame to hold the plastic over the light or see if I can get a colored plastic pint glass for the effect’s use on Halloween, just to play it safe. I’ll also be adding caution tape to the area, both to add to the effect and to keep people front getting too close. Using one “filter” didn’t produce a vivid enough color, so other colors were layer in to get the effect I wanted. A green glow was created with green, yellow and blue dividers and a fiery effect used red, yellow and orange dividers. Trying to photograph the green light on low brightness yielded a near black image despite it being more visible in person, so I’m only showing the high brightness version:
The “fire” effect was interesting. I had to get extremely close to photograph the low brightness version and the high brightness setting actually lit things up so much I had to crop the image to keep a neighbor’s house out of the shot! Once again, it looked so much more amazing in real life.
Oh yeah, trick-or-treaters aren’t going to be ignoring this effect as they head to the front door! High brightness turned out to be the best setting despite low brightness only needing two “filters” (red and orange). If you do something like this, you might want to consider setting up a hidden audio player nearby to add to the effect. I suggest a pulsing sound or something with a science fiction feel for green glow and the sound of crackling fire, chanting or the wailing of lost souls for the fiery glow. You can find more advice on where to get tracks like those over in the “Music to Haunt By and Sounds to Scare By” article series. I also tried taking pictures using the other spotlight to help the colors “pop” more:

I was only able to do this with the high brightness setups. Sadly, doing that with the low brightness setting washed out the color. But let’s get back to general usage of the spotlights.
Depending on your preference, you might want to construct some sort of camouflage housing hide the spotlights themselves from view while still letting the light shine through. Given the spotlights’ dark coloration, your yard might be dark enough to hide everything but the light from view without the need for any special covering. I only tested these for their use on Halloween and did not set them to charge up and turn on each night like most users do. So I’m afraid I can’t comment on how well they work when you have them pull double duty as both yard lights and Halloween décor lights. But given the sheer number of positive reviews and the company’s lifetime replacement guarantee, I doubt you’ll have any major issues if you decide to go that route. So if you want a portable light source for you yard on Halloween which won’t eat up batteries and won’t cost you a bundle, give Solvao’s solar spotlights a try! Home haunters might also be interested in their solar powered motion sensor light, although I should note those aren’t currently available in spotlight form.
Special thanks to Solvao for the review copies!