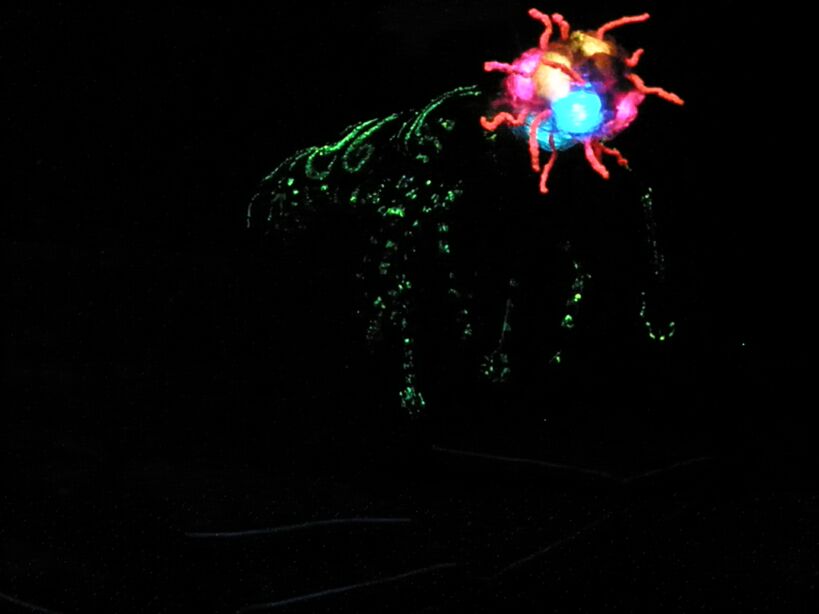
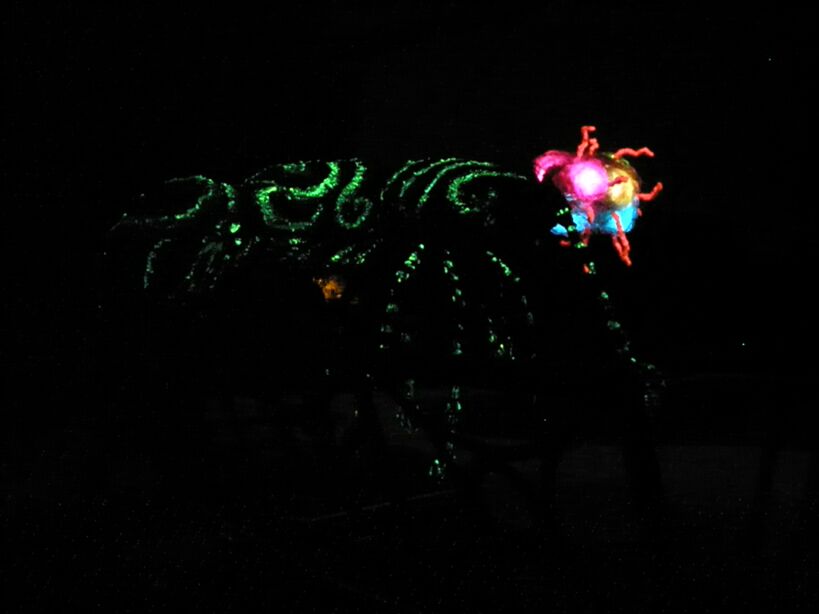
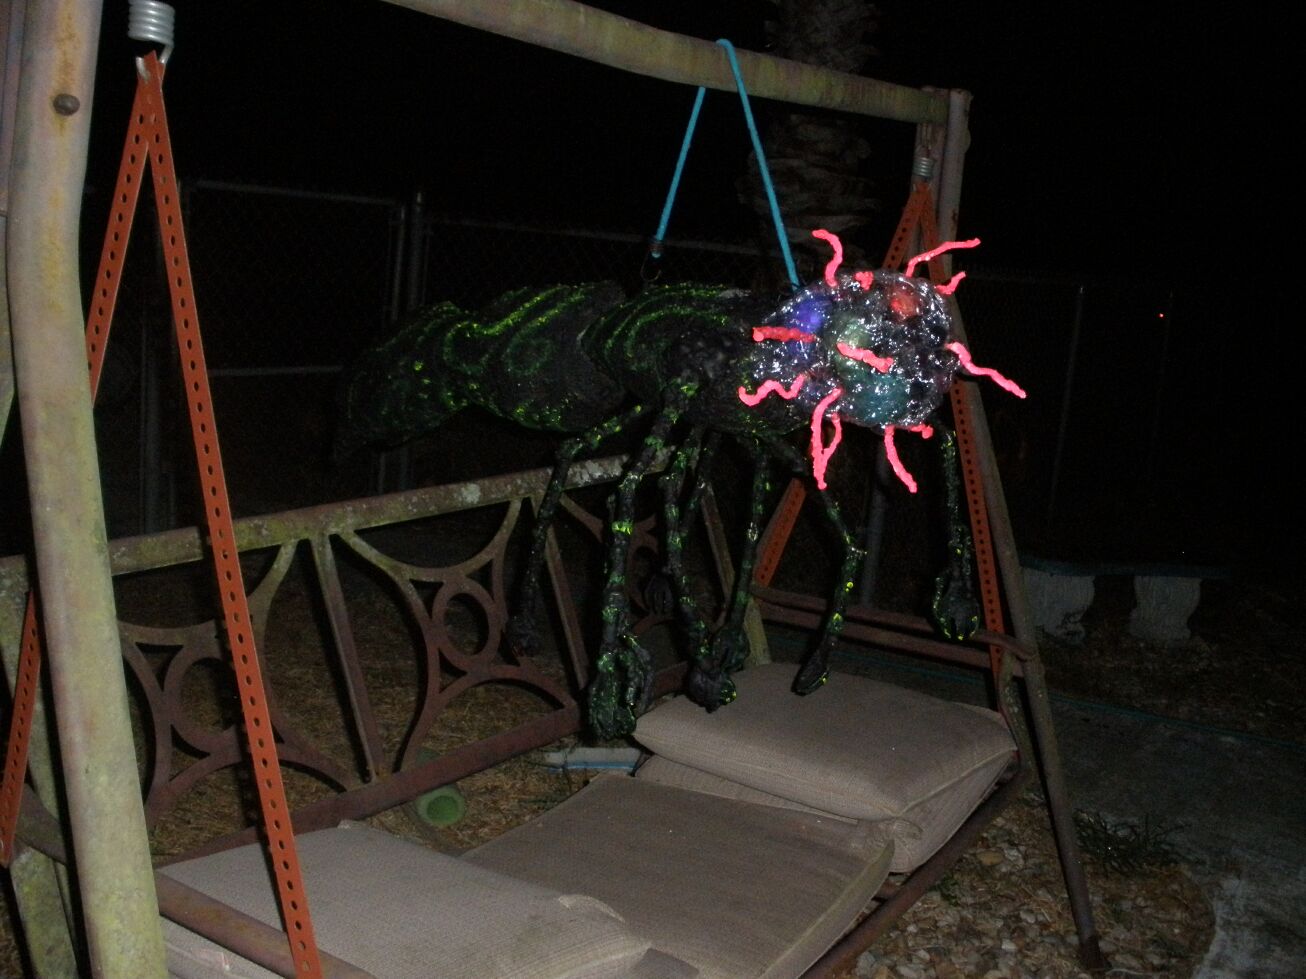
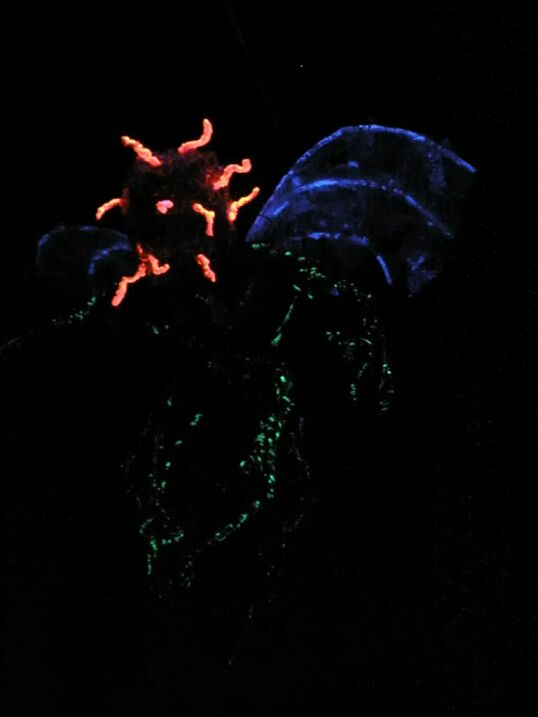
Here are the construction details of the flying Mi-Go created by Mark Jones. It’s a clever, inexpensive method for creating large-scale props using expanding foam over a PVC armature. I’ll turn things over to Mr. Jones:
Body: The body parts are made from Expanding Foam used in packing. I traced a shape of the body part onto cardboard, laid a 3’x4′ piece of plastic over it. Traced the shape with hot glue, and put another sheet onto that. Thus, I have a plastic, semi-balloon-like mold. I sprayed the foam in and it expands to fill the shape I outlined. I did this for 3 upper body parts, and 3 abdomen parts. I sort of based the shape on wasp bodies.
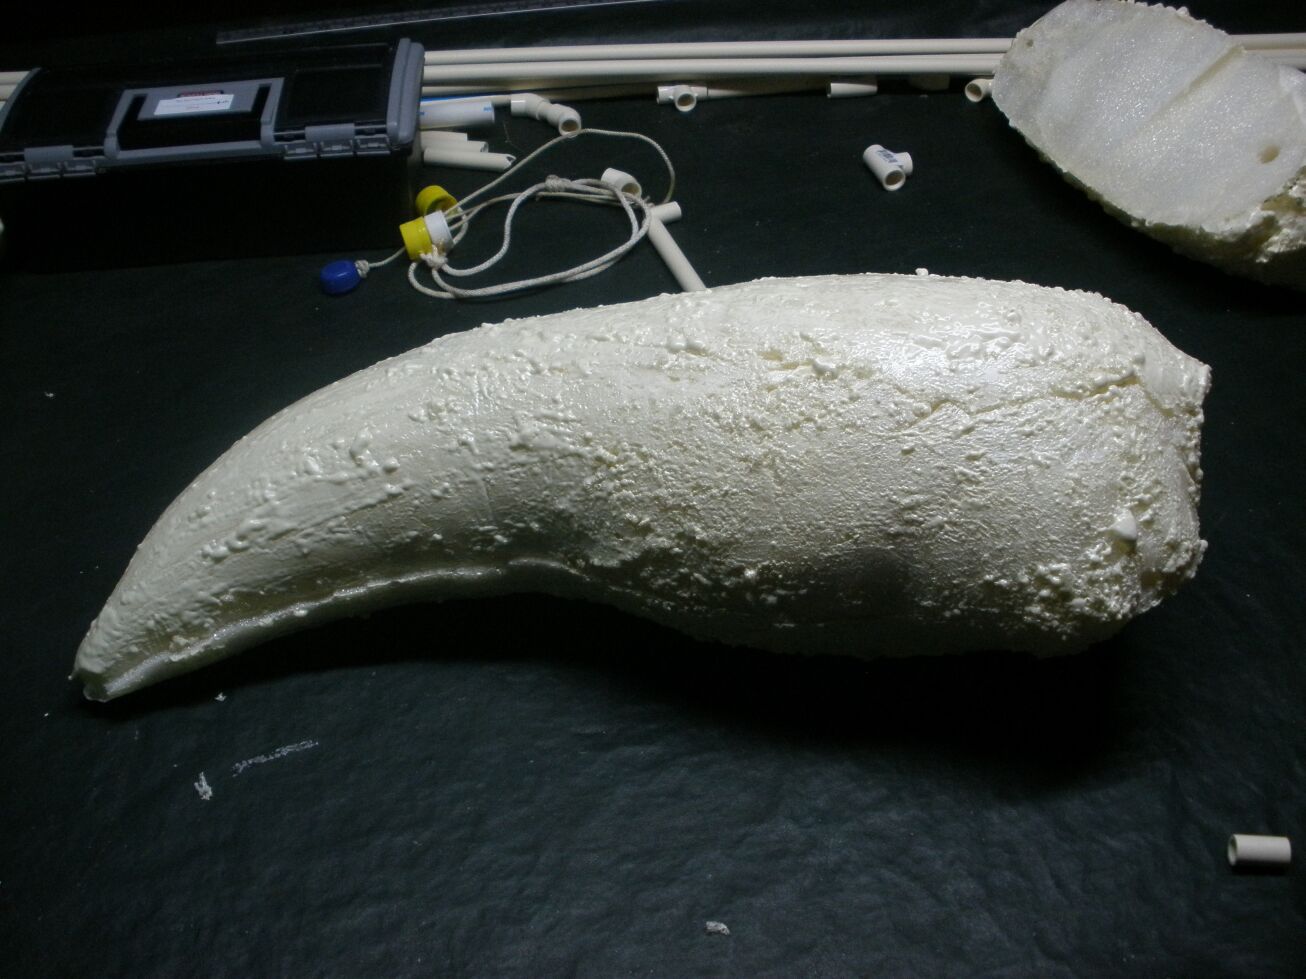

The fast foam from work is very fragile. You can press your fingers into it very easily. Great Stuff foam insulation from Home Depot is stronger when it dries. I coated all the body parts with a layer of Great stuff and smeared it around. This gave a nice lumpy surface, and a harder protective outside. I’ve used this technique on many projects.
Skeleton:
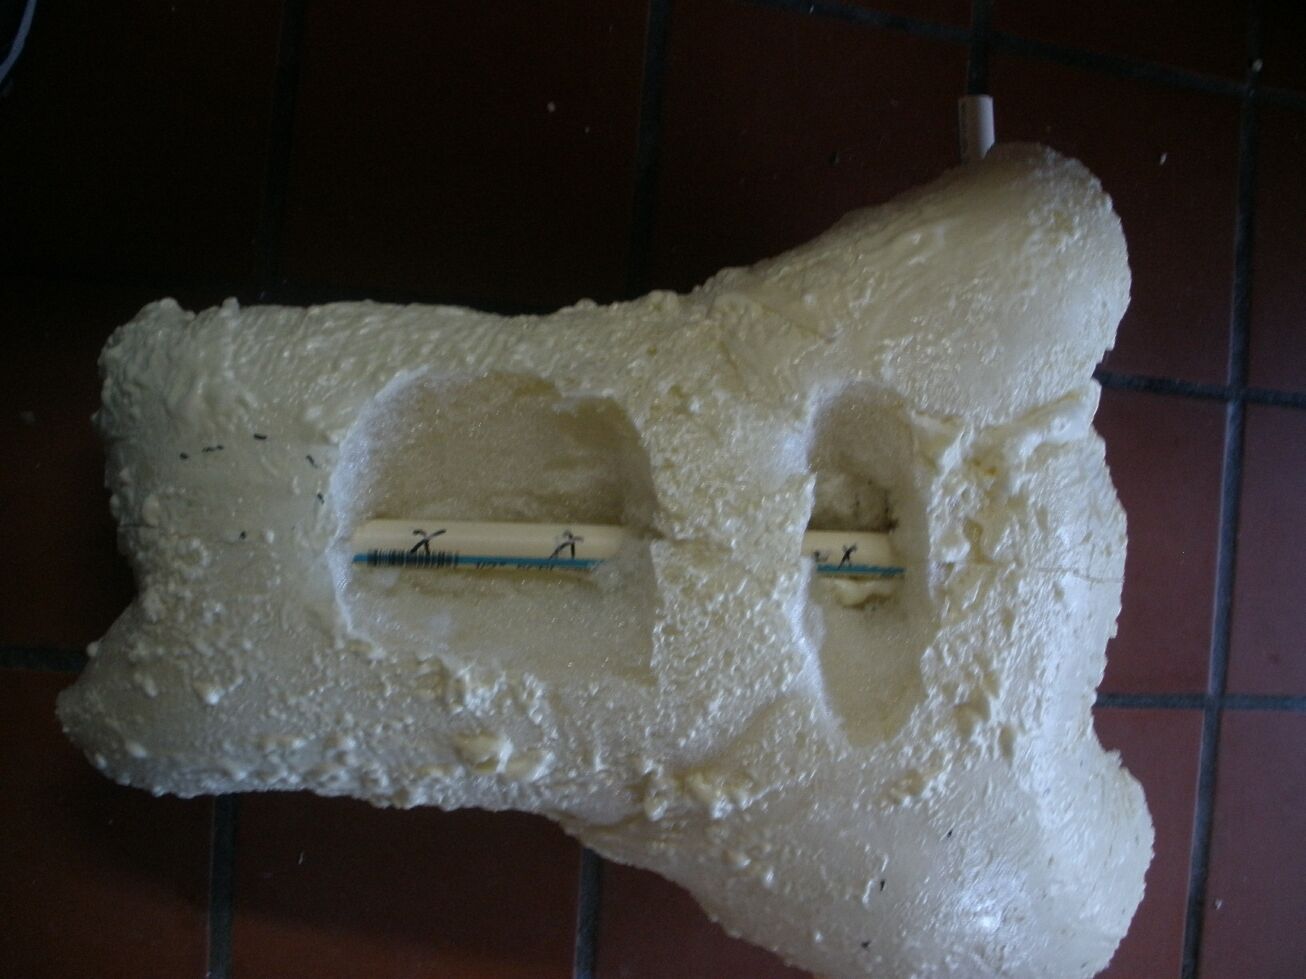
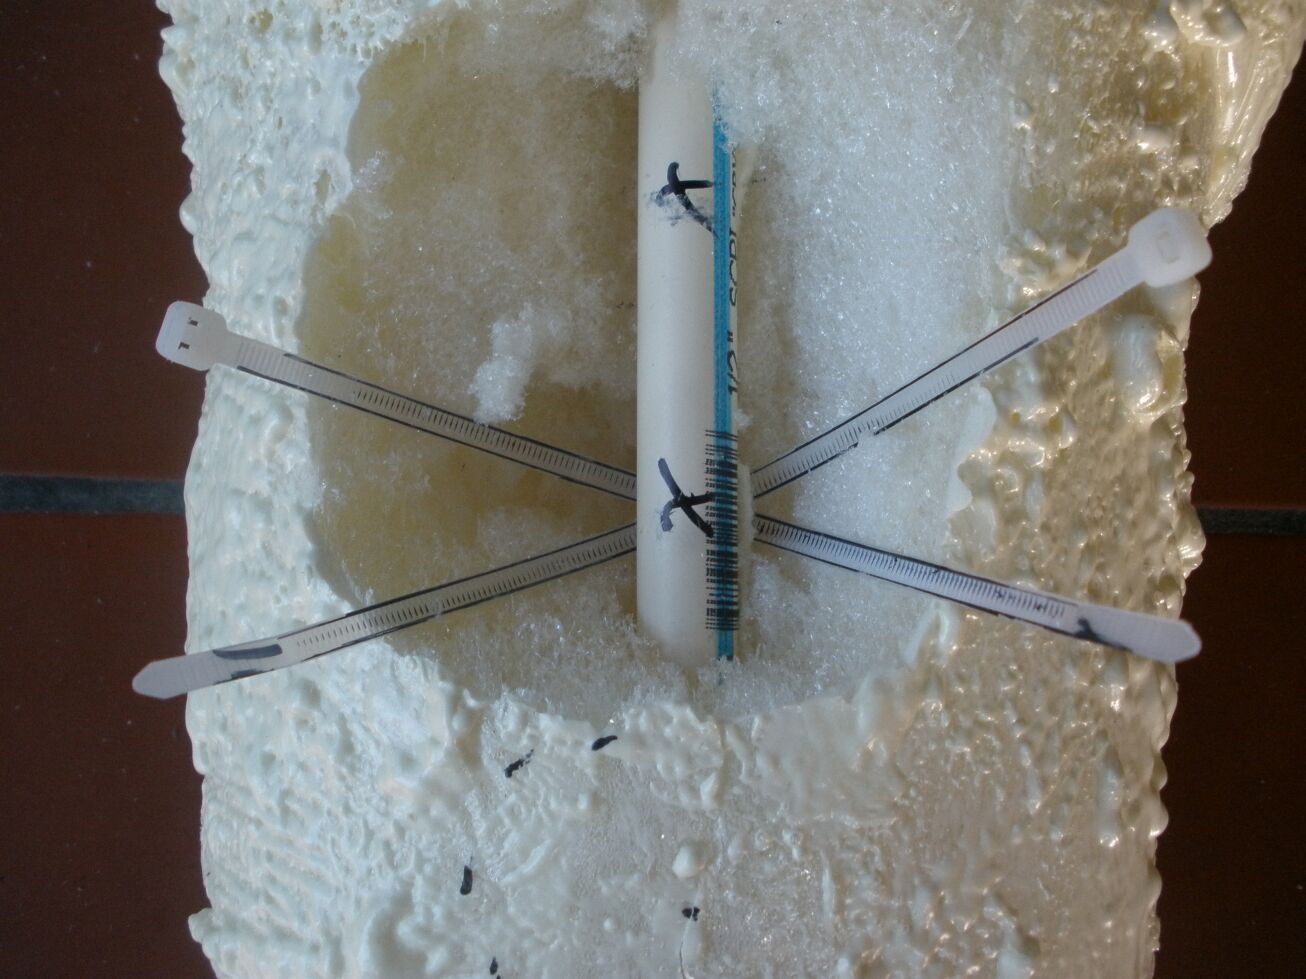
I used 1/2″ cpvc pipe for the basis of the rest of the skeleton. The upper body has a rectangle shape aligned vertically to the body. The top bar is the attachment for the wings, the bottom bar is the attachment for the legs, the front for the head, and the back is for the tail.
I attached two tubes to each side of the upper skeleton. These are where the wings would set into. (more on wings later). From the front bar of the rectangle, there was a T fitting. I drilled a 1/2″ hole in the juncture, so I could slide it onto the vertical front bar. Thus I had one fitting facing forward (for the neck) and two going left-right (for the arms).
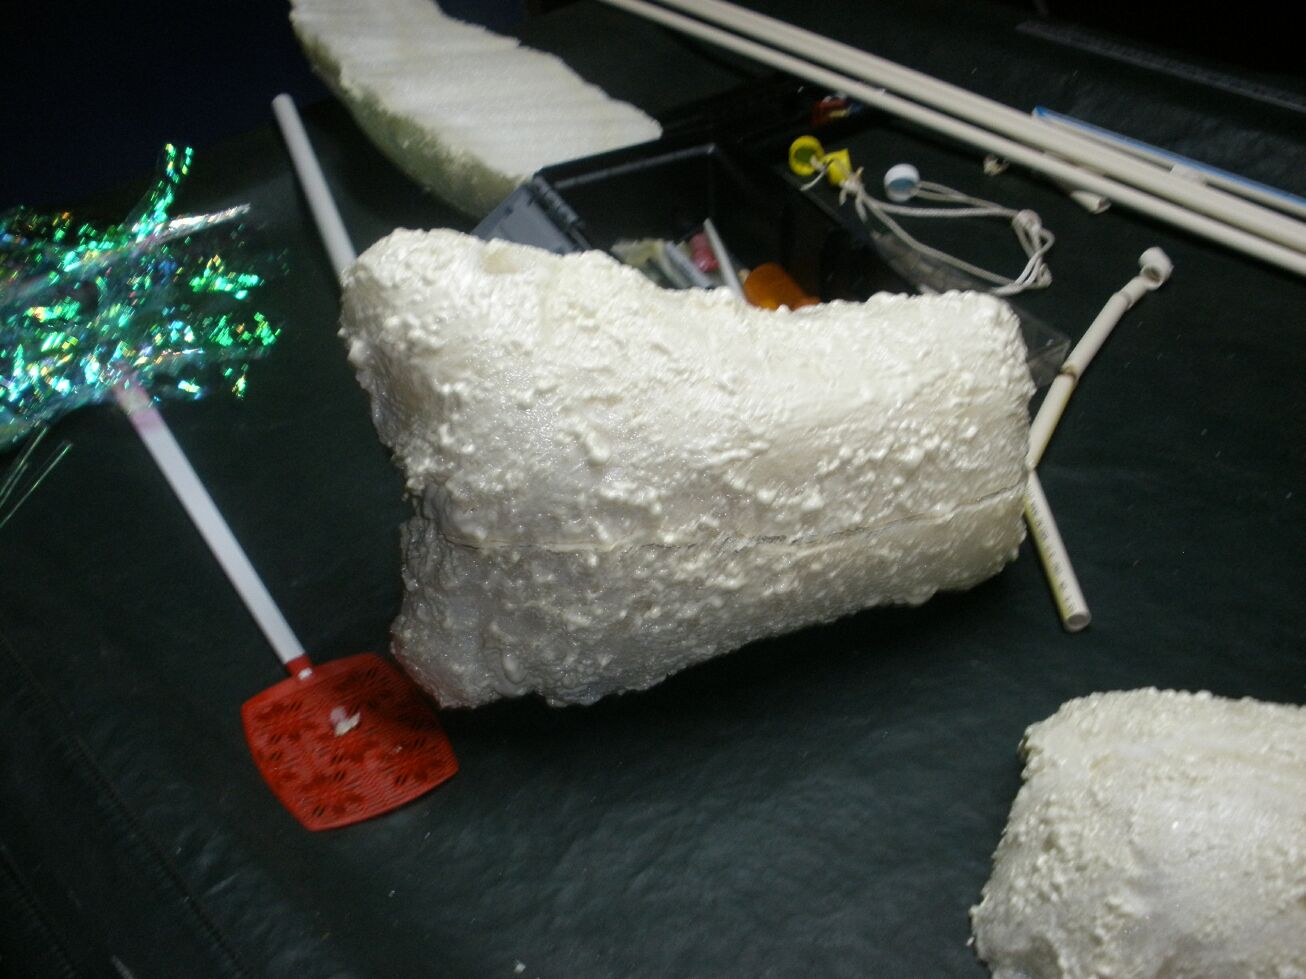
I have a hot-wire foam cutter I made and sliced the upper body and tail vertically from front to back. I then carved out the shape of the space where the plastic pipes would fit inside. I used Great stuff as “glue” to put it back together with the appropriate parts stick out.
Legs:
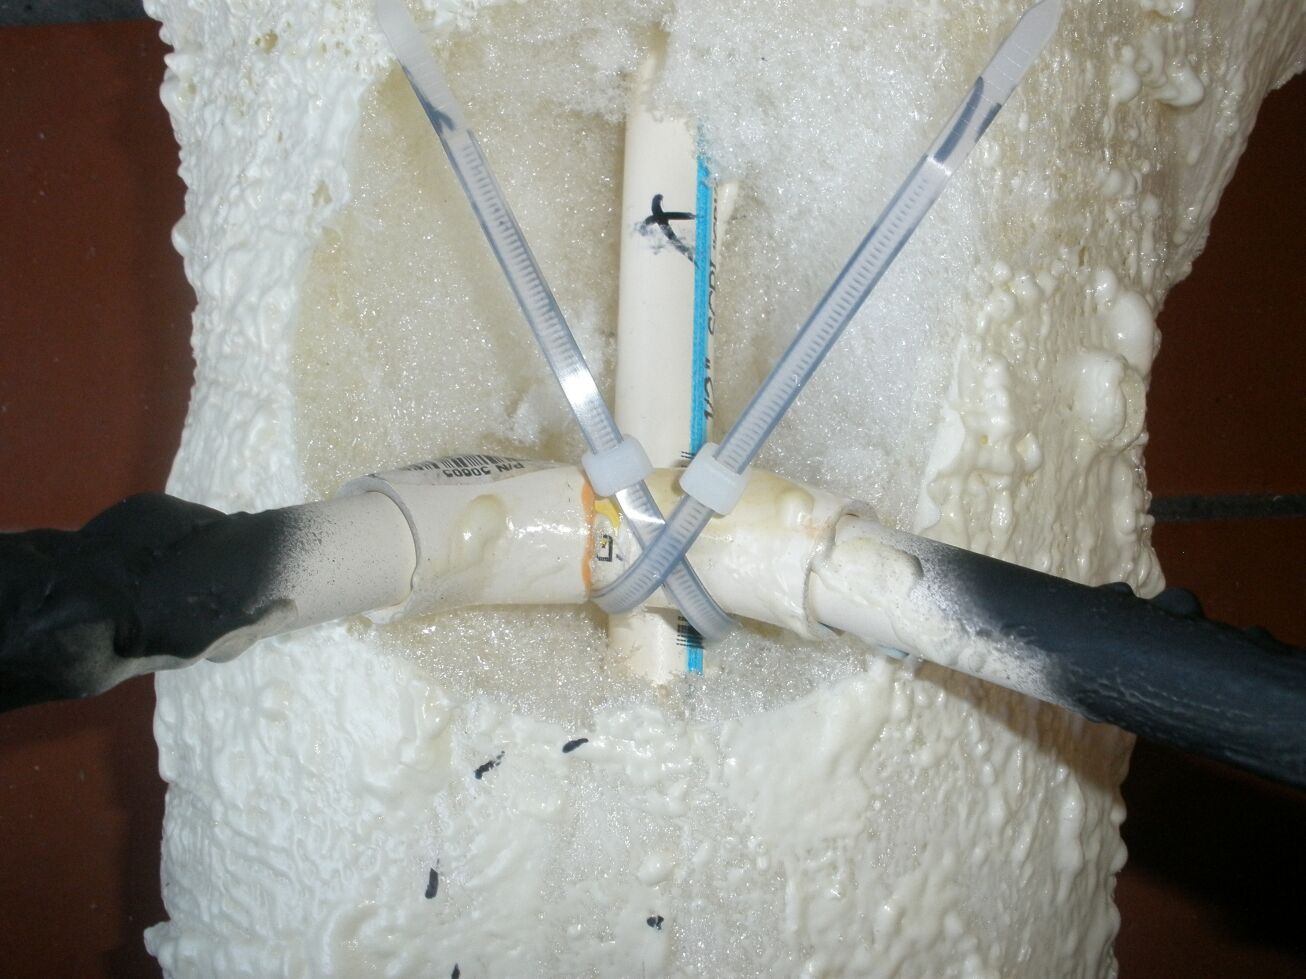
I wanted the legs to be springy and tried 3 or 4 designs before I found a simple solution. The leg sections are the same pvc pipe. each section is cut at an angle for the bend of the legs. Two holes are drilled and the top of each joint. Two sections are attached at the joints with two small tie-wraps. There is 1″ piece of pipe with a 45 degree connector on each side. This is the leg “hub” for each pair of
legs. 3 sections make up each leg. The claw is a salad fork. You can find them cheap at Party City stores. Each section has a 3-foot piece of bungee cord running through it, to the hub, and through to the next section. The cord is pinned at the end of each leg. This gives the sections the bounce and the tie wraps keep them bending just one directions.
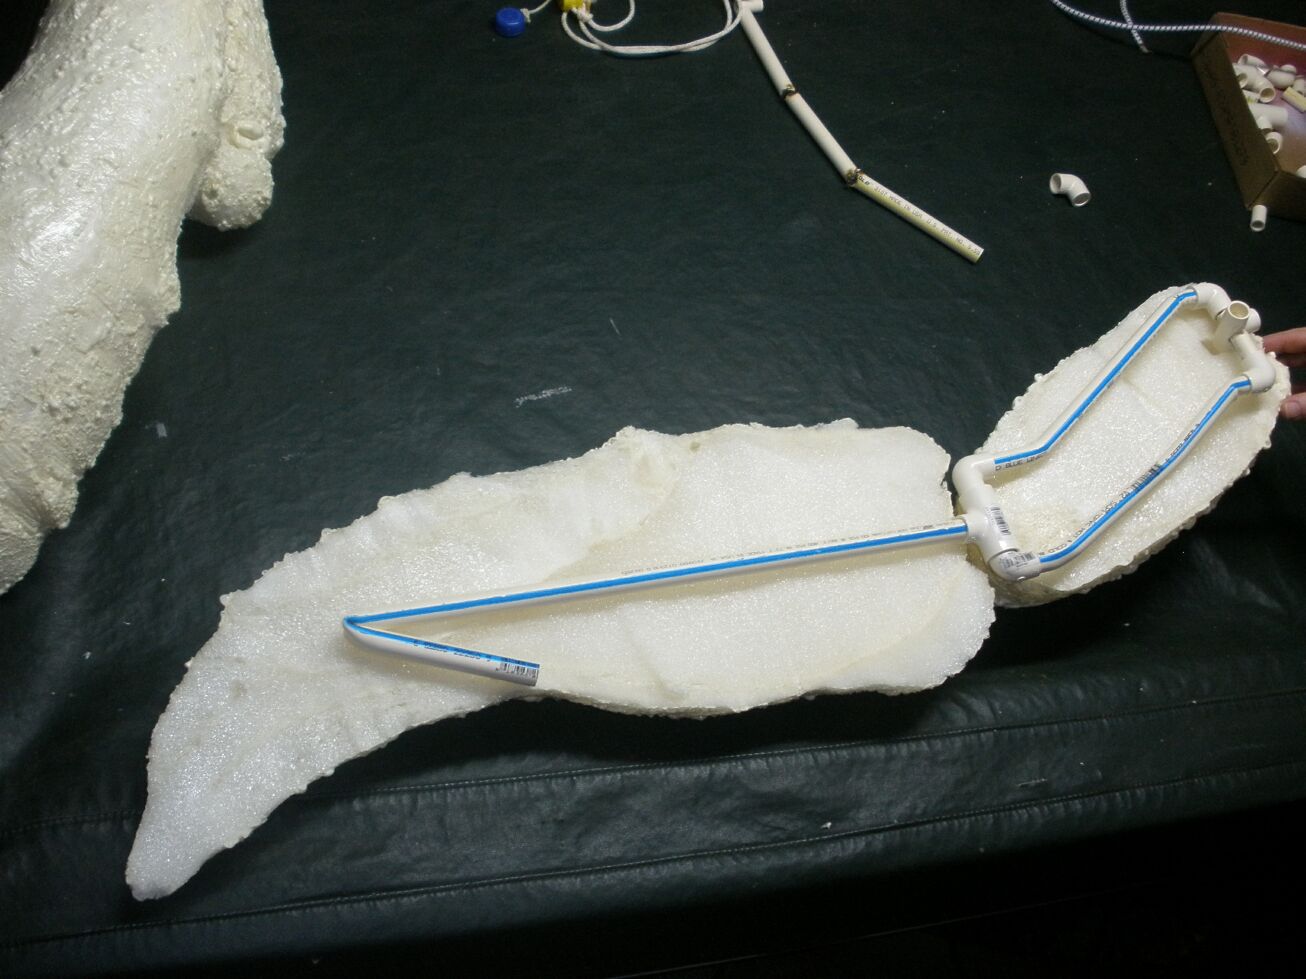
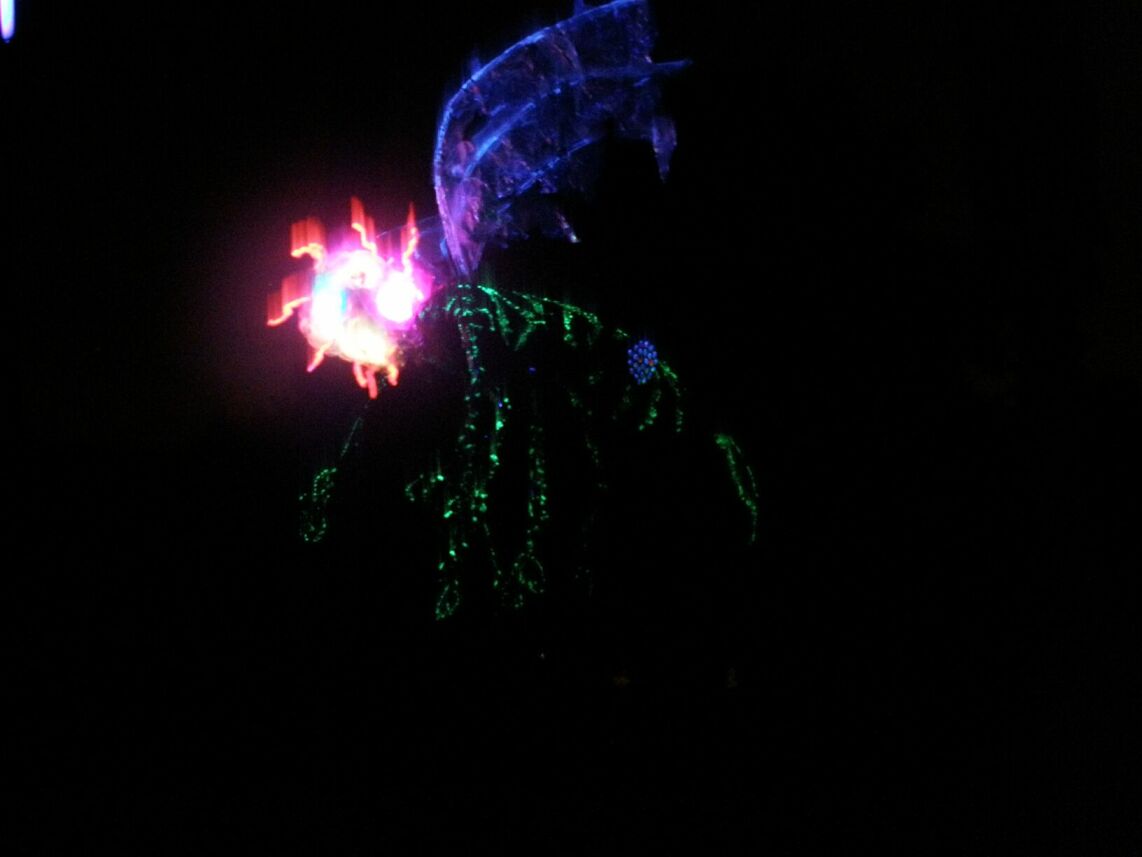
Wings:
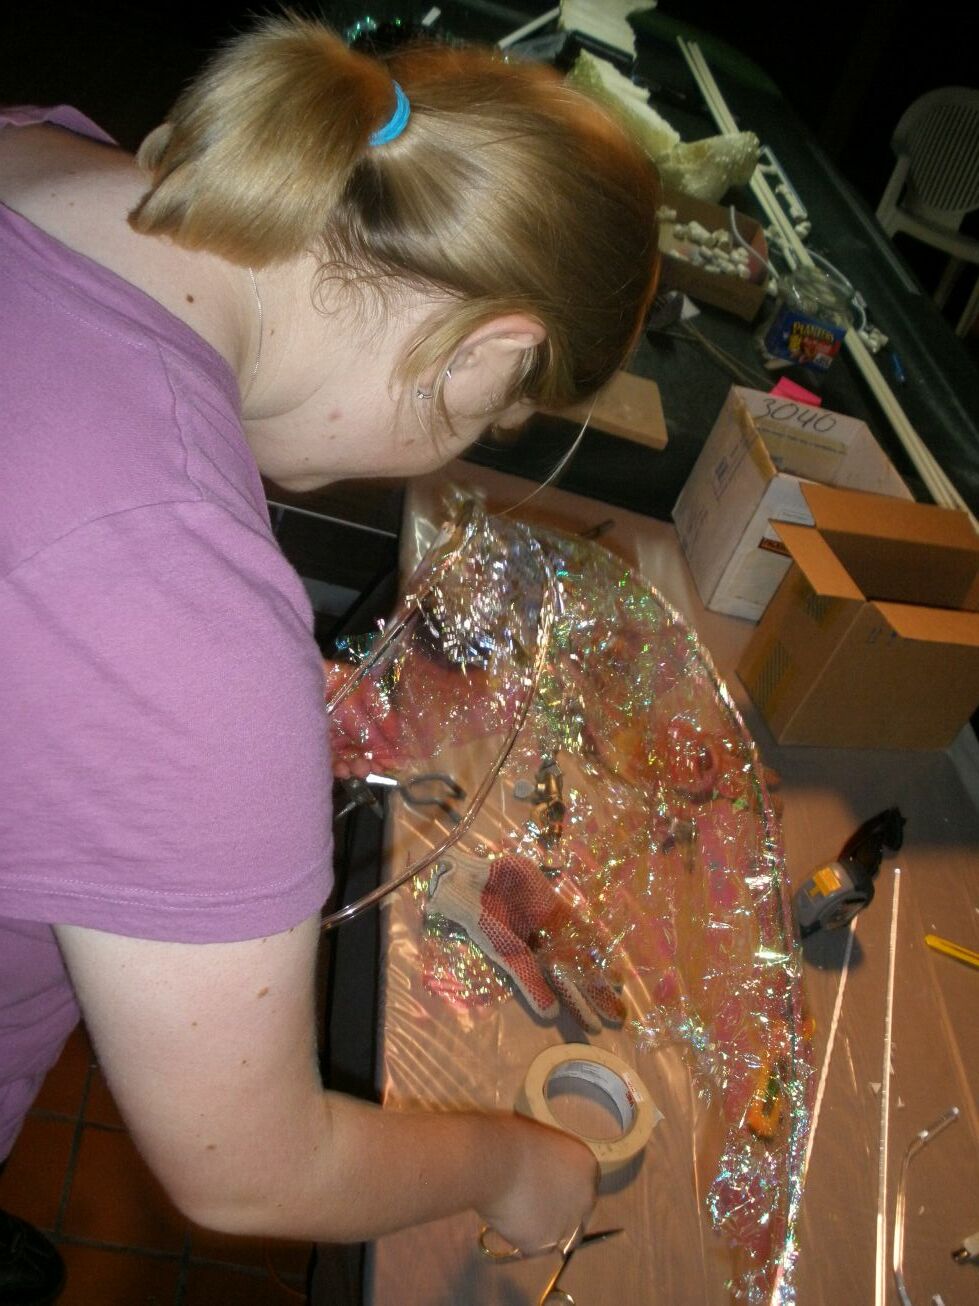
The wings are made up of three rods of 1/4″ Plexiglas and iridescent cellophane wrapping. Rods were bought from a plastics supply company I frequent. The wrapping was from Party City, and it took two rolls, counting trial and error. The rods were cut into 3-foot lengths. A heat gun was used to put a curve into each rod. A bend 6 inches from the end was put a one end, to act as the mounting point. 3 rods were taped together at this straight mounting end, and fit into the vertical tubes in the back of the migo body. The three rods were kept spread apart by a springy piece of wire from an old Car window shade. Small loops were bent into the ends of the wire, and it was tie-wrapped to the wing-rods. With the shape in place, the cellophane was cut into strips, crumpled up, smoothed out and hot glued to the wing rods. This gave a torn, ragged, ethereal look to the wings.

Head:
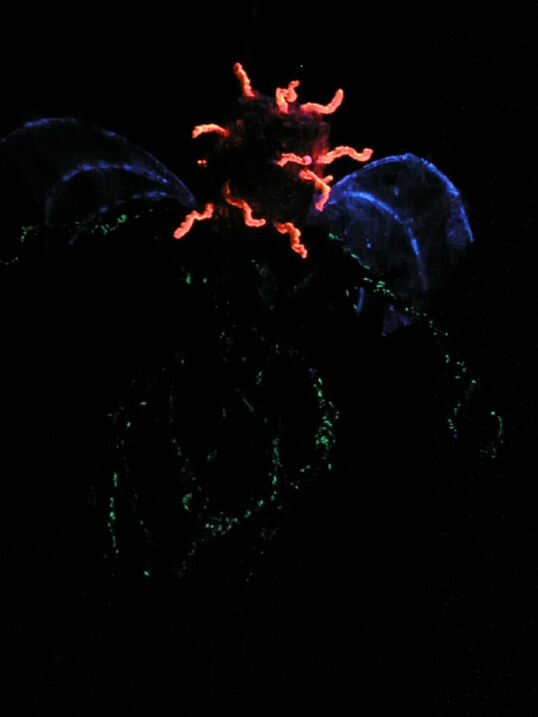
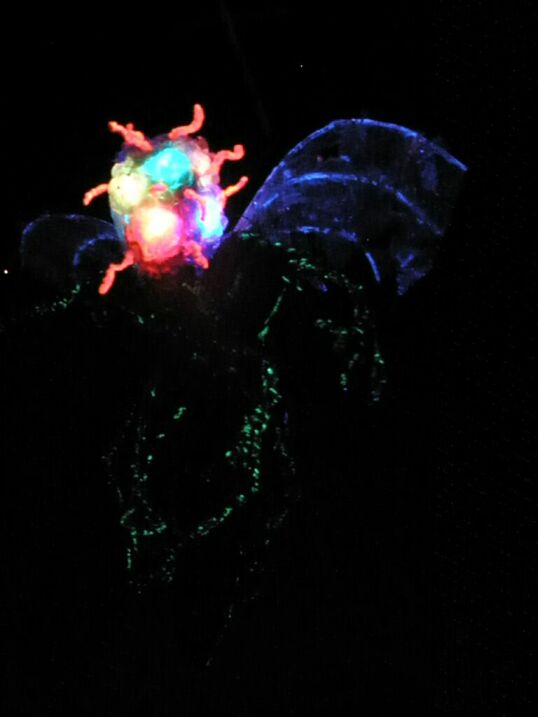
This part I was never happy with the results. I did a lot of trial and error and finally settled on this design. They looked a bit better in real life than in the pictures. I started with a foam ball shape about 6″x4″ in rough shape. I had found some LED lights, battery opperated, each one color changing. I embedded the lights randomly around the foam core, and hot glued them into place. I crumpled a ball of cellophane and glued it over each light to diffuse it (this did not work as well as I would have liked.) I then covered the whole head with bubble wrap to simulate the “brain-like” nature of the Migo head.
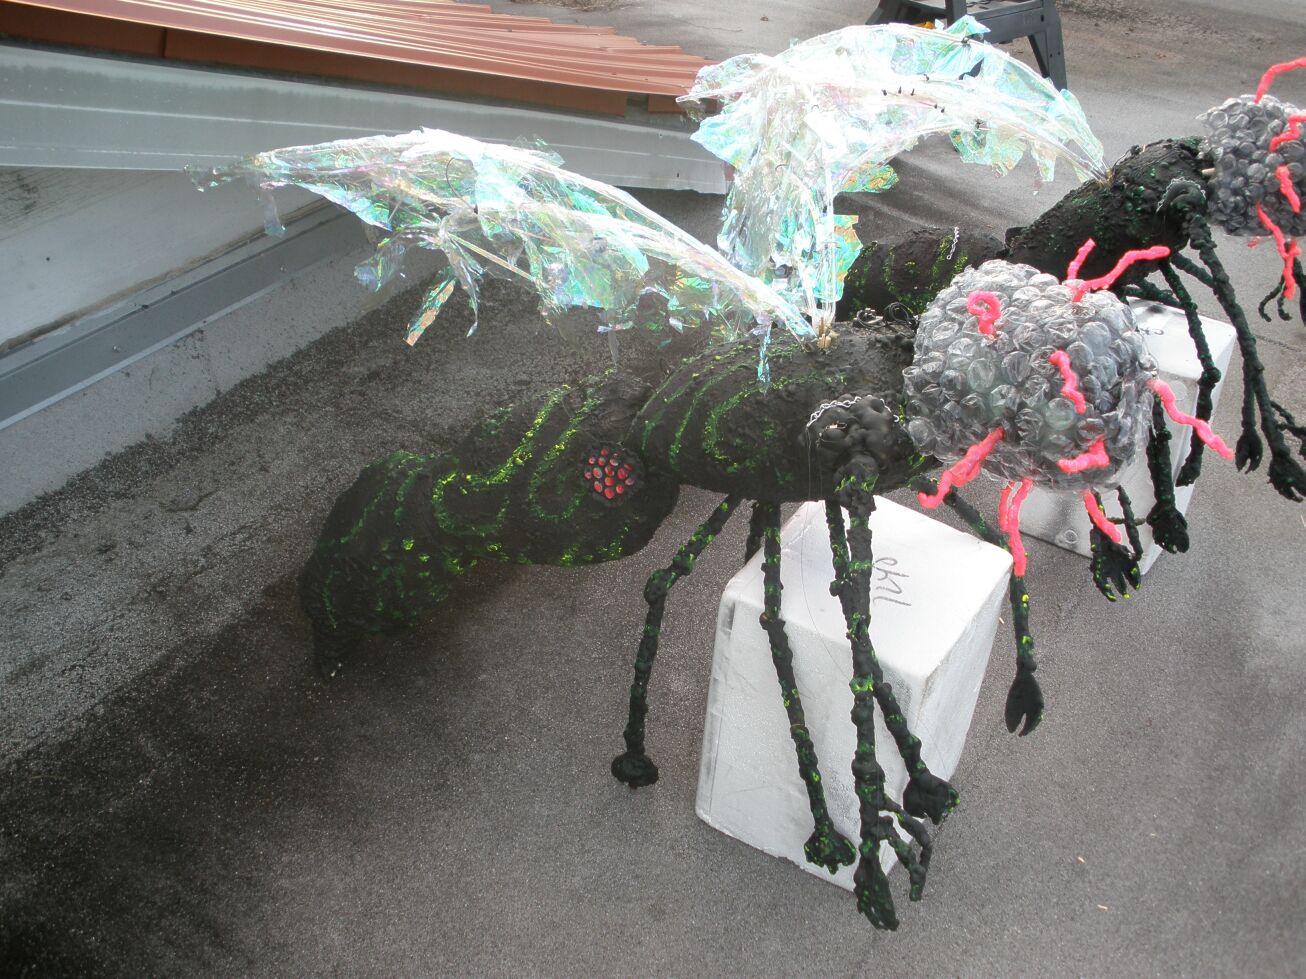
The antenna came out well. I took pipe cleaners, smeared the Great Stuff foam on them and allowed to dry. These were painted with red fluorescent paint. I stripped about 1 inch of the end, applied hot glue and stuck it through the bubble wrap into the core foam. Those came out well. The “neck” part of the skeleton was an 6″ pointed piece of pvc, so I just stuck the head on. The batter pack (4 AA batteries) was embedded into a slot cut in the upper back of the body section. Since the migo were hanging in the air, and it was dark, it could not be seen.
All of the parts except the wing were painted with Krylon Ultra Flat black paint. I used Wildfire fluorescent yellow in a type of highlighting technique to paint the lines on the body. I kept the brush kind of flat, and drug it over the lumps the foam made. This produced a nice effect.
Each of the migo had three attachment points for lines to hang them on. One at each shoulder and one just before the tail section. Wire then ran to a large, bamboo pole with a cross piece. This allowed my minions to dangle them off the roof during the presentation.


Oct 04 2016
Yet More Free Horror Movie Commentaries
The Movie Crypt and The Horror Movie Show offer a mix of regular podcast episodes and film commentaries while HORROR TOWN and Two Drink Minimum Commentaries focus more on commentaries.
Speaking of focus, One of Us and the Incompetent Movie Commentary opt to cover a variety of genres rather than just on horror. But if you only want commentaries for 80’s and 90’s horror movies, just head on over to Slasher Studios. F This Movie! has uploaded many free commentary tracks onto the Internet Archive, but the one they recorded for Sleepaway Camp stands out for being their very first one. It also stands out for the sheer amount of profanities uttered over the course of it! BloodbathsAndBoomsticks may only have a commentary track for Spookies at this time, but it’s well worth checking out!
CraveOnline managed to get Child’s Play creator Don Mancini to record his thoughts on the ventriloquist dummy classic that is Magic and Laser Time has their own twisted look at Gremlins ready for you.
Army of Darkness fans will definitely appreciate the free commentaries from OutNowPodcast and The Crossover Podcast.
Sadly, free downloadable commentaries are becoming harder to find these days, as many are either charging money for commentaries or only making them available in streaming form. Thankfully, the streaming commentaries are still free (at least for now). The Weekly Planet lets you stream their commentary on Jurassic Park to see if you would be interested in purchasing it for future use, as is the case with the commentary track for A Nightmare on Elm Street by Red Letter Media. Remember the audio movie H.P. Lovecraft’s The Dunwich Horror I reviewed awhile back? You can stream the official commentary through a series of videos on its similarly official Facebook page.
Since this probably going to be the final installment of this particular series, here’s the complete list of past installments:
Free Horror Movie Commentaries!
More Free Horror Movie Commentaries
Even More Free Horror Movie Commentaries
Still More Free Horror Movie Commentaries
As always, Gravedigger’s Local 16 is not to be held responsible for anything that may occur (be it good or bad) as a result of downloading from any links given here. Attempt at your own discretion. Blah blah blah…