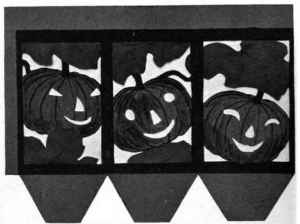
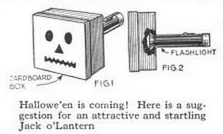
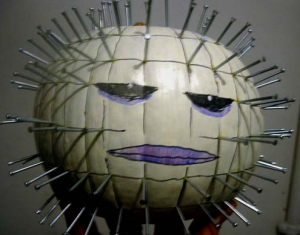
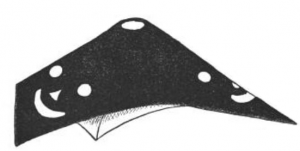
"What is he that builds stronger than either the mason, the shipwright, or the carpenter?"
Header image

When you think of homemade slime, chances are you think of the classic recipe involving cornstarch and water. However, there are numerous other ways to make your own slime:

Martin Bridge Blazing Ahead! by Jessica Scott Kerrin and Joseph Kelly has a recipe that uses Gummi Bears as the principal ingredient!

Susan Ohanian’s From Pumpkin Time to Valentines suggests making slime using oatmeal!

Prize-Winning Science Fair Projects for Curious Kids by Joe Rhatigan and Rain Newcomb has a recipe that seems closer to the type of slime you can buy in stores. The secret ingredient? Powdered laundry booster.

Similzrly, Plastics and Polymers Science Fair Projects by Madeline P. Goodstein does something similar, this time suggesting Borax (along with necessary safety tips for using it).

That reminds me. I remember reading that the actress who played the little girl in The Monster That Challenged the World once did an interview where she revealed how the titular monster’s slime was created using only water and a particular brand of soap flakes. Does anyone out there know the recipe?

If you want, Peggy Ashbrook’s Science is Simple has an experiment you could do with your slime. If only similarly simple directions were given for making this slime-powered musical instrument!

Please make sure to wear old clothes while trying these recipes, as they might stain certain fabrics and/or surfaces.

Gravedigger’s Local 16 is not to be held responsible for anything that may occur (be it good or bad) as a result of constructing a project that’s detailed on any links. Attempt at your own discretion.

Whether you’re a parent, babysitter or teacher in need of some seasonal distractions for the little ones, you’ve come to the right place. Coloring sheets are a quick and easy way to keep children occupied so you can get some much needed peace and quiet. All you have to do is visit the following links and print ’til your heart’s content:

The Google Books preview for Brenda Kaufmann’s Fall Math Activities: Standards-based Skill-builders With Season Themes
has a coloring page filled with monsters and other Halloween symbols.

The official websites for both Hershey’s and Ben & Jerry’s have both coloring pages and other fun Halloween activities for kids.

Fans of Dora the Explorer will enjoy this Halloween-themed Dora coloring page.

Disney’s Go.com has a “Monster Lab” coloring page in their “Family Fun” section.

Kaboose.com has a special “Trick or Treat” Halloween coloring page.

Do you like the image at the top of this page? It’s from Ravensblight.com’s coloring page section. Speaking of which, the site also has some more advanced projects for those who are too old for coloring, such as an awesome skeleton and papercraft skull.

Special thanks to Ray O’Bannon for the use of the image!

Pick yours...

One of the simplest (and least expensive) homemade haunt props is the spooky bottle or jar. A little glue, a label and something to put inside are all you need to turn an ordinary jar or bottle into a creepy prop. Spooky labels let you add a creepy feel to your Halloween party’s selection of drinks in addition to creating Halloween prop standards like poison, potions, body parts and lab specimens in jars. A shelf filled with such props can create a very impressive display indeed. One can easily make labels using a word processing program, but those tend to look simplistic. That’s why I’ve gathered up a bunch of cool-looking free labels one can simply print out:

Halloween Clip Art – Martha Stewart
Herman Secret’s Album: Potion Labels
Vintage Poison Labels – Spookshows.com
Morties Mortuary Halloween Bottle Label Prop
Wine Label Replacements for Halloween Parties
Other Apothecary Jar Labels – Halloween Forum
Printable Props & Decorations | My Ghoul Friday
Halloween Labels for Bottles (and more) – Instructables
I Make Projects – Making Canned Halloween Monstrosities
Propnomicon: Arkham Sanitarium Pharmacy Labels (and Lovecraftian Pharmacy Labels)

I should note that the My Ghoul Friday and Martha Stewart links also offer other types of printable Halloween decor. Well, that, and how you can find more free labels on Google Books. Google Books also reveals that there was a massive debate about poison label laws back in the day, along with noting how vintage poison labels were often printed in red ink and the origin of the “skull and crossbones” symbol for poison.

As what to put in your bottles and jars, the only limit is your imagination. Coloring water with food coloring often works well. For glowing chemicals, use flat tonic water, water mixed with a highlighter fluid or milk with a blacklight. If you use milk, be sure to pour it on the night you’ll be displaying your containers, as you don’t want to leave it out a long time and spoil. The Halloween Propmaker’s Handbook by Ken Pitek shows how to make a potion that does neat things when the container holding it is shaken. Using creepy-looking growing toys can also work with a variety of themes. You can even sculpt your own creepy items for the jars! Just keep in mind that certain dyes and chemicals might stain the container (or anything placed in them), so plan accordingly. You can even skip water altogether and fill them with various kinds of fake animals, dirt, etc.

Gravedigger’s Local 16 is not to be held responsible for the content on or anything that may occur (be it good or bad) as a result of visiting or downloading from any links on those sites (or constructing a project that’s detailed on them). Attempt at your own risk.

We’ve all heard the jokes about the perceived uselessness of Halloween cards, but the truth is they have their uses. Judging from the Google Books preview for Diane C. Arkins’ Halloween Merrymaking, they seem to have developed from the market for Halloween party invitations. Nowadays, they also seem to act as the October version of blank “Just Because” cards. I actually got a Halloween card on Halloween once. You see, a buddy and I used to visit haunted attractions every October (my first three haunt reviews are the result of that tradition) until he had to move to a larger house when he started a family. The year he moved, well, I think you can guess what he sent me that October.

Seeing as how the US Postal Service could use a boost in income, I thought I’d share a bunch of free cards with you. Why are they free? Well, they were made before 1923 and as I noted in Spirit Rapppings, any American work published before January 1, 1923 is in the US public domain. They can be either be used as standard greeting cards or be simply printed out and glued onto cardboard to use as postcards. So whether you want to use them as invites for your spooky shindigs or surprise a friend this month, feel free to print ‘em out:

I don't even know what I am!

You can find a larger version of the above card over at Wikipedia (albeit with a border you’ll need to crop out).

If her shadow is any indication, that guy in the mirror is in trouble...

Click for larger version

Again with the mirror!


Click for larger version

Wait, WHAT?

Click for larger version

In case you’re wondering about all the focus on mirrors in those cards, it’s a reference to a now defunct Halloween tradition. It was once believed that if a woman stood in front of a mirror at midnight and brushed her hair three times, the face of her future husband would appear over her shoulder if she was going to get married that year. This was only one of many ridiculous ways one was supposedly able to tell their marital future on Halloween.

If those cards aren’t enough for you, then Ravensblight.com has you covered. Granted, they’re not in the public domain, but you can still send ‘em to friends. Ravensblight has both a pop-up card and a selection of standard greeting cards, both with envelopes. It’s also possible to alter the Necronomicon book covers and notebooks into greeting cards.

Although we think our information is solid, at the end of the day we have to admit that we’re not lawyers. Our legal commentary is worth exactly what you paid for. We’re just sharing this since this is interesting and those seeking to benefit from allegedly public domain works should consult at least one lawyer before doing so. Gravedigger’s Local 16 is not to be held responsible for anything that may occur (be it good or bad) as a result of visiting any of the links in this article or using the material noted here. Attempt at your own discretion.

The Hieratic Head of Ezra Pound doesn't have anything on us!

Seeing as how last year’s article about making your own Tiki stuff turned out so well, I thought I would revisit the subject this year.

If the wooden Tiki idol how-to from last year was not to your satisfaction, then perhaps you should try this article about making a cement Tiki garden idol.

What better way to spice up your Tiki bar than to build this nifty model of Thor Heyerdahl’s famous Kon-Tiki raft? If woodworking isn’t your thing, perhaps this papercraft Kon-Tiki replica would be more to your liking. Speaking of papercraft goodies, what Tiki bar would be complete without a dancing hula girl?

For something that’s potentially freakier, read up on making Tiki heads and designing Tiki pendants. The book that has the Tiki pendant instructions also has a perfect activity for those who are listening along to the music mentioned here: Drawing to island music.

Lighting is an essential part of any Tiki set-up, from the dim (but inviting) lamps to the red glowing eyes behind Tiki masks (accomplished by using a red Christmas lightbulb in a nightlight positioned a safe distance behind the mask). Go here to learn how to make your own hurricane lamps and Tiki votive candle holders. Do you want fire in your Tiki bar? Be both safe (and smart) by using one of the many fake flame tutorials available at the Monster Page of Halloween Project Links. Also of interest is this article, which lists types of wood that glow certain colors under a blacklight without needing any UV-reactive paint. It’s the perfect way to make your Tiki stuff extra freaky.

Searching Amazon yielded several mask-making kits that can be used to create Tiki decor, along with a special mold for making concrete Moais you can use to turn any yard into Easter Island. But if you’re going to go on Amazon to order stuff, you might as well go whole hog and choose from the various masks, idols, and other Tiki essentials that are already made. While we’re on Amazon, I should note how I think this educational “Moon in My Room” toy would work great in both Tiki set-ups and home haunts.

While searching for the above tutorials, I also found some instructions on making musical instruments. While only a few would look good hanging around a Tiki bar, all could be of use for anyone who wants to try their hand a making their own exotica tunes. This article shows how to make a candolin and a bottle xylophone and the very next page of the same magazine shows how to make a boom-whacker and quick ‘n dirty castanets. Although the directions given here are for a “toy” ukelele, I’d imagine that scaling up the plans would result in a serviceable standard ukelele. Finally, you can learn how to make a homemade glockenspiel, triangle, drum, and cymbals here.

For more Tiki decor goodness, be sure to visit the list of Tiki bar ideas over at the amazing TikiBarPlans.org!

As noted in previous “How-To” posts, Gravedigger’s Local 16 is not to be held responsible for the content on or anything that may occur (be it good or bad) as a result of visiting any links on those sites (or constructing a project that’s detailed on them and downloading anything from them). Attempt at your own risk.

A Halloween How-To: Costumes, Parties, Decorations, and Destinations by Lesley Pratt Bannatyne has tons of easy tricks to pull during your next Halloween party or haunted house, with my favorites being the dropping spider and half man gags.

Here’s something to do when you’re bored while on Twitter: Tweet the phrase “Beetlejuice Beetlejuice Beetlejuice” and wait for the fun to begin.

Remember the “giallo movie generator” from last year’s countdown? Well, here’s something similar devoted to Clive Barker’s love scenes. Is it NSFW? You’d better believe it!

Gravedigger’s Local 16 favorite Barrett’s Haunted Mansion put up a cool offer on their Facebook page: They’re giving free admission to the haunt (but not the “Buried Alive” attraction) to any customer who was born in October!

I highly recommend looking up haunted attractions in your area and then checking their Facebook/Twitter/etc. pages for discount coupons. I’ve found ones for the Factory of Terror in Fall River, MA and the Century Haunted Hayride in Auburn, MA so far and I bet you can find even more.

Have a bunch of walnuts and aren’t feeling hungry? Then make some hobgoblins using the notes from this 1943 issue of Popular Science.

Dryer lint. A worthless byproduct or an awesome free source of fake moss for Halloween displays? Read the Amazon preview for How To Haunt Your House by Shawn and Lynne Mitchell to decide for yourself.

Speaking of Amazon previews, the one for Halloween Crafts: Eerily Elegant Decor by Kasey Rogers and Mark Wood has creepy clip art and instructions on how to make things like fake candles.

Finally, the Google books preview for The Halloween Activity Book: Creepy, Crawly, Hairy, Scary Things to Do by Mymi Doinet and Benjamin Chaud shows you how to make monster mirrors and ghoulish garlands.

Gravedigger’s Local 16 is not to be held responsible for the content on or anything that may occur (be it good or bad) as a result of visiting any links on those sites (or constructing a project that’s detailed on them). Attempt at your own discretion.

This puts a new spin on the phrase "Deads Heads"
Although associated with African jungles and voodoo in American popular culture, shrunken heads are actually a product of select South American and Melanesian tribes. Most reference material on the matter focuses on the Jivaro, a collective term for the Shuar, Achuar, Huambisa and Aguaruna groups. The purpose of the shrunken heads is simple: When an enemy is slain (especially one that has killed a family member), their head is removed and shrunken in order to keep the spirit trapped inside. That way, the ghost could not seek revenge and any fallen family members were both avenged and honored. Despite the importance of their creation, many of them were discarded after they had been completed and their purpose had been served.

How were the heads shrunk? Obviously the head gets cut off after the initial ceremony, but then the skull (and muscles, fat etc.) are removed after the skin has been split via a cut made starting at the back of the neck. After objects have been inserted in order help the head keep its basic shape during the shrinking process, the eyelids and mouth are sealed shut. Once fully sealed, the head is boiled in water mixed with special herbs. The head is then dried and further shrunken in hot sand. After any final molding of the face, the shrunken head is rubbed in ashes and sometimes decorations are even added. As the person preparing it had to fast during the process, a big feast was held after completion and the head was displayed there.

Although shrunken heads were relatively rare at first, the interest generated by travelers to those areas resulted in a huge increase in the number of shrunken heads being produced. Apparently killings increased and bodies were stolen to meet the initial demand, but later monkeys and animal skins were used to manufacture artificial ones.

If you want a shrunken head and the store-bought rubber ones just aren’t enough, there is another (and legal) way to get one. All you need is an apple, a few household items and at least two and a half weeks (don’t worry, you won’t have to work for that long). You can find all of necessary directions here. For those of you who don’t have that much time, this site has and alternate method that can yield faster results at the cost of the head’s quality. But hopefully my posting this information early on in the Halloween countdown will give you all more than enough time to have your shrunken head(s) ready in time for the big day.

With all of the music reviews that are being done for the Freaky Tiki Surf-ari, odds are that some of you have developed a hankering for some Tiki stuff of your very own. The appeal of Tiki bar decor is very understandable, whether you want it regular or spooky. With that in mind, I have put together a little selection of projects you can make at home. Some might need to be altered a bit to make them more freaky, but that’s hardly a big deal.

Page 168 of Matt Maranian’s Pad: the guide to ultra-living by Matt Maranian shows you how you can turn a Tiki mug into a cool lamp.

Retro Mania!: 60 Hip Handmade Cards, Scrapbook Pages, Gifts & More! by Judi Watanabe, Alison Eads, and Laurie Dewberry shows how to make a Tiki greeting card (perfect for inviting friends over for drinks) on page 35.

This two-part article from a 1961 issue of Popular Mechanics shows how to construct a wooden Tiki idol.

The sections on the “Safari Cube” and “Tiki Cube” on page 94 of Cube Chic: Take Your Office Space from Drab to Fab! by Kelley Moore tells you both where to get Tiki goodies and interesting ways to turn a room into a Tiki bar-style environment.

Finally, for those who prefer their Tiki tutorials to be spooky from the get-go, here is a collection of links from HalloweenForum.com:

Enjoy!

As noted in previous “How-To” posts, Gravedigger’s Local 16 is not to be held responsible for the content on or anything that may occur (be it good or bad) as a result of visiting any links on those sites (or constructing a project that’s detailed on them). Attempt at your own risk.

Back when I originally started looking for Halloween stuff online, Uncialle’s Halloween Darksite was one of the first few of my discoveries. I was both intrigued and amazed by her instructions on making a homemade pond monster and mummy and faithfully visited the site every month hoping for new prop instructions. But one day, the updates stopped coming. Disappointed, I eventually moved on and mostly forgot about the site.

Years later, I was thrilled to find that Uncialle had merely switched over from Geocities to her own hosted domain rather than abandon the site and that all of the my favorite how-tos were still there.

To celebrate my rediscovery, I thought I’d share Uncialle’s “Tips for Fast Haunting” and some directions on making two fairly easy props with you all. They’re perfect for any “Oh no, Halloween is almost here and I haven’t done anything to prepare” moments you might experience in the week to come. Happy haunting!

Ah, latex masks. Halloween and horror movies simply wouldn’t be the same if they didn’t exist. In fact, it was once thought that such masks could replace makeup entirely! But although many of us drool over such masks, sometimes the price of one is scarier than the creature it depicts.

So why not make on yourself? If you (or someone you know) can make a good-looking clay sculpture, you’re already part of the way there. Although the initial investment in obtaining all the necessary materials might seem expensive now, the end results could potentially save you money normally spent on masks in the long run. To learn more, please visit the mask-making tutorials at the following linked sites:

Haunters Hangout Mask Making
Spooky Blue’s Halloween Haunt Projects
The MonsterMakers: How to Make a Monster!

Pages 14-21 of the Google Books preview for The Monster Makers Mask Makers Handbook by Arnold Goldman also give some great mask-making tips.

After you finish making your own latex masks, you’re going to need to know how to store and care for them. Thankfully, the Mask Dr has a handy online guide available.

Or if all that seems too complicated and time-consuming for you, there’s always paper masks.

As noted in yesterday’s “How-To” post, Gravedigger’s Local 16 is not to be held responsible for the content on or anything that may occur (be it good or bad) as a result of visiting any links on those sites (or constructing a project that’s detailed on them). Attempt at your own risk.

No, this isn’t a review of the classic AIP film of the same name. Instead, this blog entry is intended to point you in the direction of some handy how-tos in case you need something extra special for your Halloween display, haunted attraction or costume party.

The online preview of Dan Reeder’s Papier-Māché Monsters: Turn Trinkets and Trash Into Magnificent Monstrosities is a great place to start. The materials are fairly inexpensive (and easy) to come by and the results look really neat. Sadly, said preview doesn’t contain any information about creating fake eyeballs. Thank goodness Haunters Hangout has a tutorial on the matter (along with other cool Halloween projects). Similarly, the Monster Page of Halloween Project Links has a wealth of information about creating your own monsters (and other cool Halloween props). Who says you need to be a mad scientist to make your own monsters?

Like Haunters Hangout and the Monsterlist, Gravedigger’s Local 16 is not to be held responsible for the content on or anything that may occur (be it good or bad) as a result of visiting any links on those sites (or constructing a project that’s detailed on them). Attempt at your own risk.

For those of you not satisfied by my previous forays into printable decorations, check these out:

The Monster Maze has several printable warning signs that’d look great in any mad scientist-related display.

On a related note, Warningsigngenerator.com and Safety Sign Builder let you make customized warning signs that you can print out for free. However, Safety Sign Builder seems to require you to sign up on their site before they’ll let you print anything.

Hewlett-Packard’s crafts section has some Halloween decorations for doorbells, along with the usual assortment of printable masks and Halloween cards.

Dadcando.com has an interesting way of making a printable magic wand. However, unlike the other projects shown in this post, this one requires use of a glue gun and some painting.

MadHaus Creative used to have great tutorials about making a head in a jar and a tube full of eyeballs using printouts, but they’ve recently been removed. The reason for this is because some jerk had the nerve to steal stuff from the website, burn it onto a DVD-R, and tried selling it on ebay as if he created it all. I’m planning on writing an e-mail to that site’s webmaster to show my support in the near future and I hope that anyone reading this does the same. Hopefully, this will get him to bring those tutorials back.

Economic woes eating up your Halloween budget? If you’ve got a well-stocked color printer and some glue, then we’ve got you covered!

If you have a lot of spare time and patience, you might want to try making the “following portraits” of Frankenstein’s monster and Dracula available at Frankenpaper.

Haunted Dimensions offers papercraft versions of tombstones and other things associated with Disney’s Haunted Mansion.

The H. P. Lovecraft Historical Society offers up toe tags, death certificates, and a Miskatonic University diploma that are perfect for haunted houses.

You can spook up any non-digital clocks in your house using the “13 hour clock” images from the Monster Maze or the Ghoul Skool.

The Halloween section of Canon’s papercraft site has a small assortment of kid-friendly masks and cards. Those who want more serious decorations can try assembling the realistic papercraft snowy owls (Great for Harry Potter-inspired setups) and a cat that I’m sure can be easily modified into a black cat.

I’ve saved the best for last: Ravensblight has printable games, masks, paintings, and other cool stuff (like this creepy little fellow). There’s even free music!

Want a “Hellraiser puzzlebox” without having to spend a fortune? Just follow the instructions here and you’ll be all set!

Bad Behavior has blocked 1447 access attempts in the last 7 days.